Instax Photography Tips (First Time in LA)
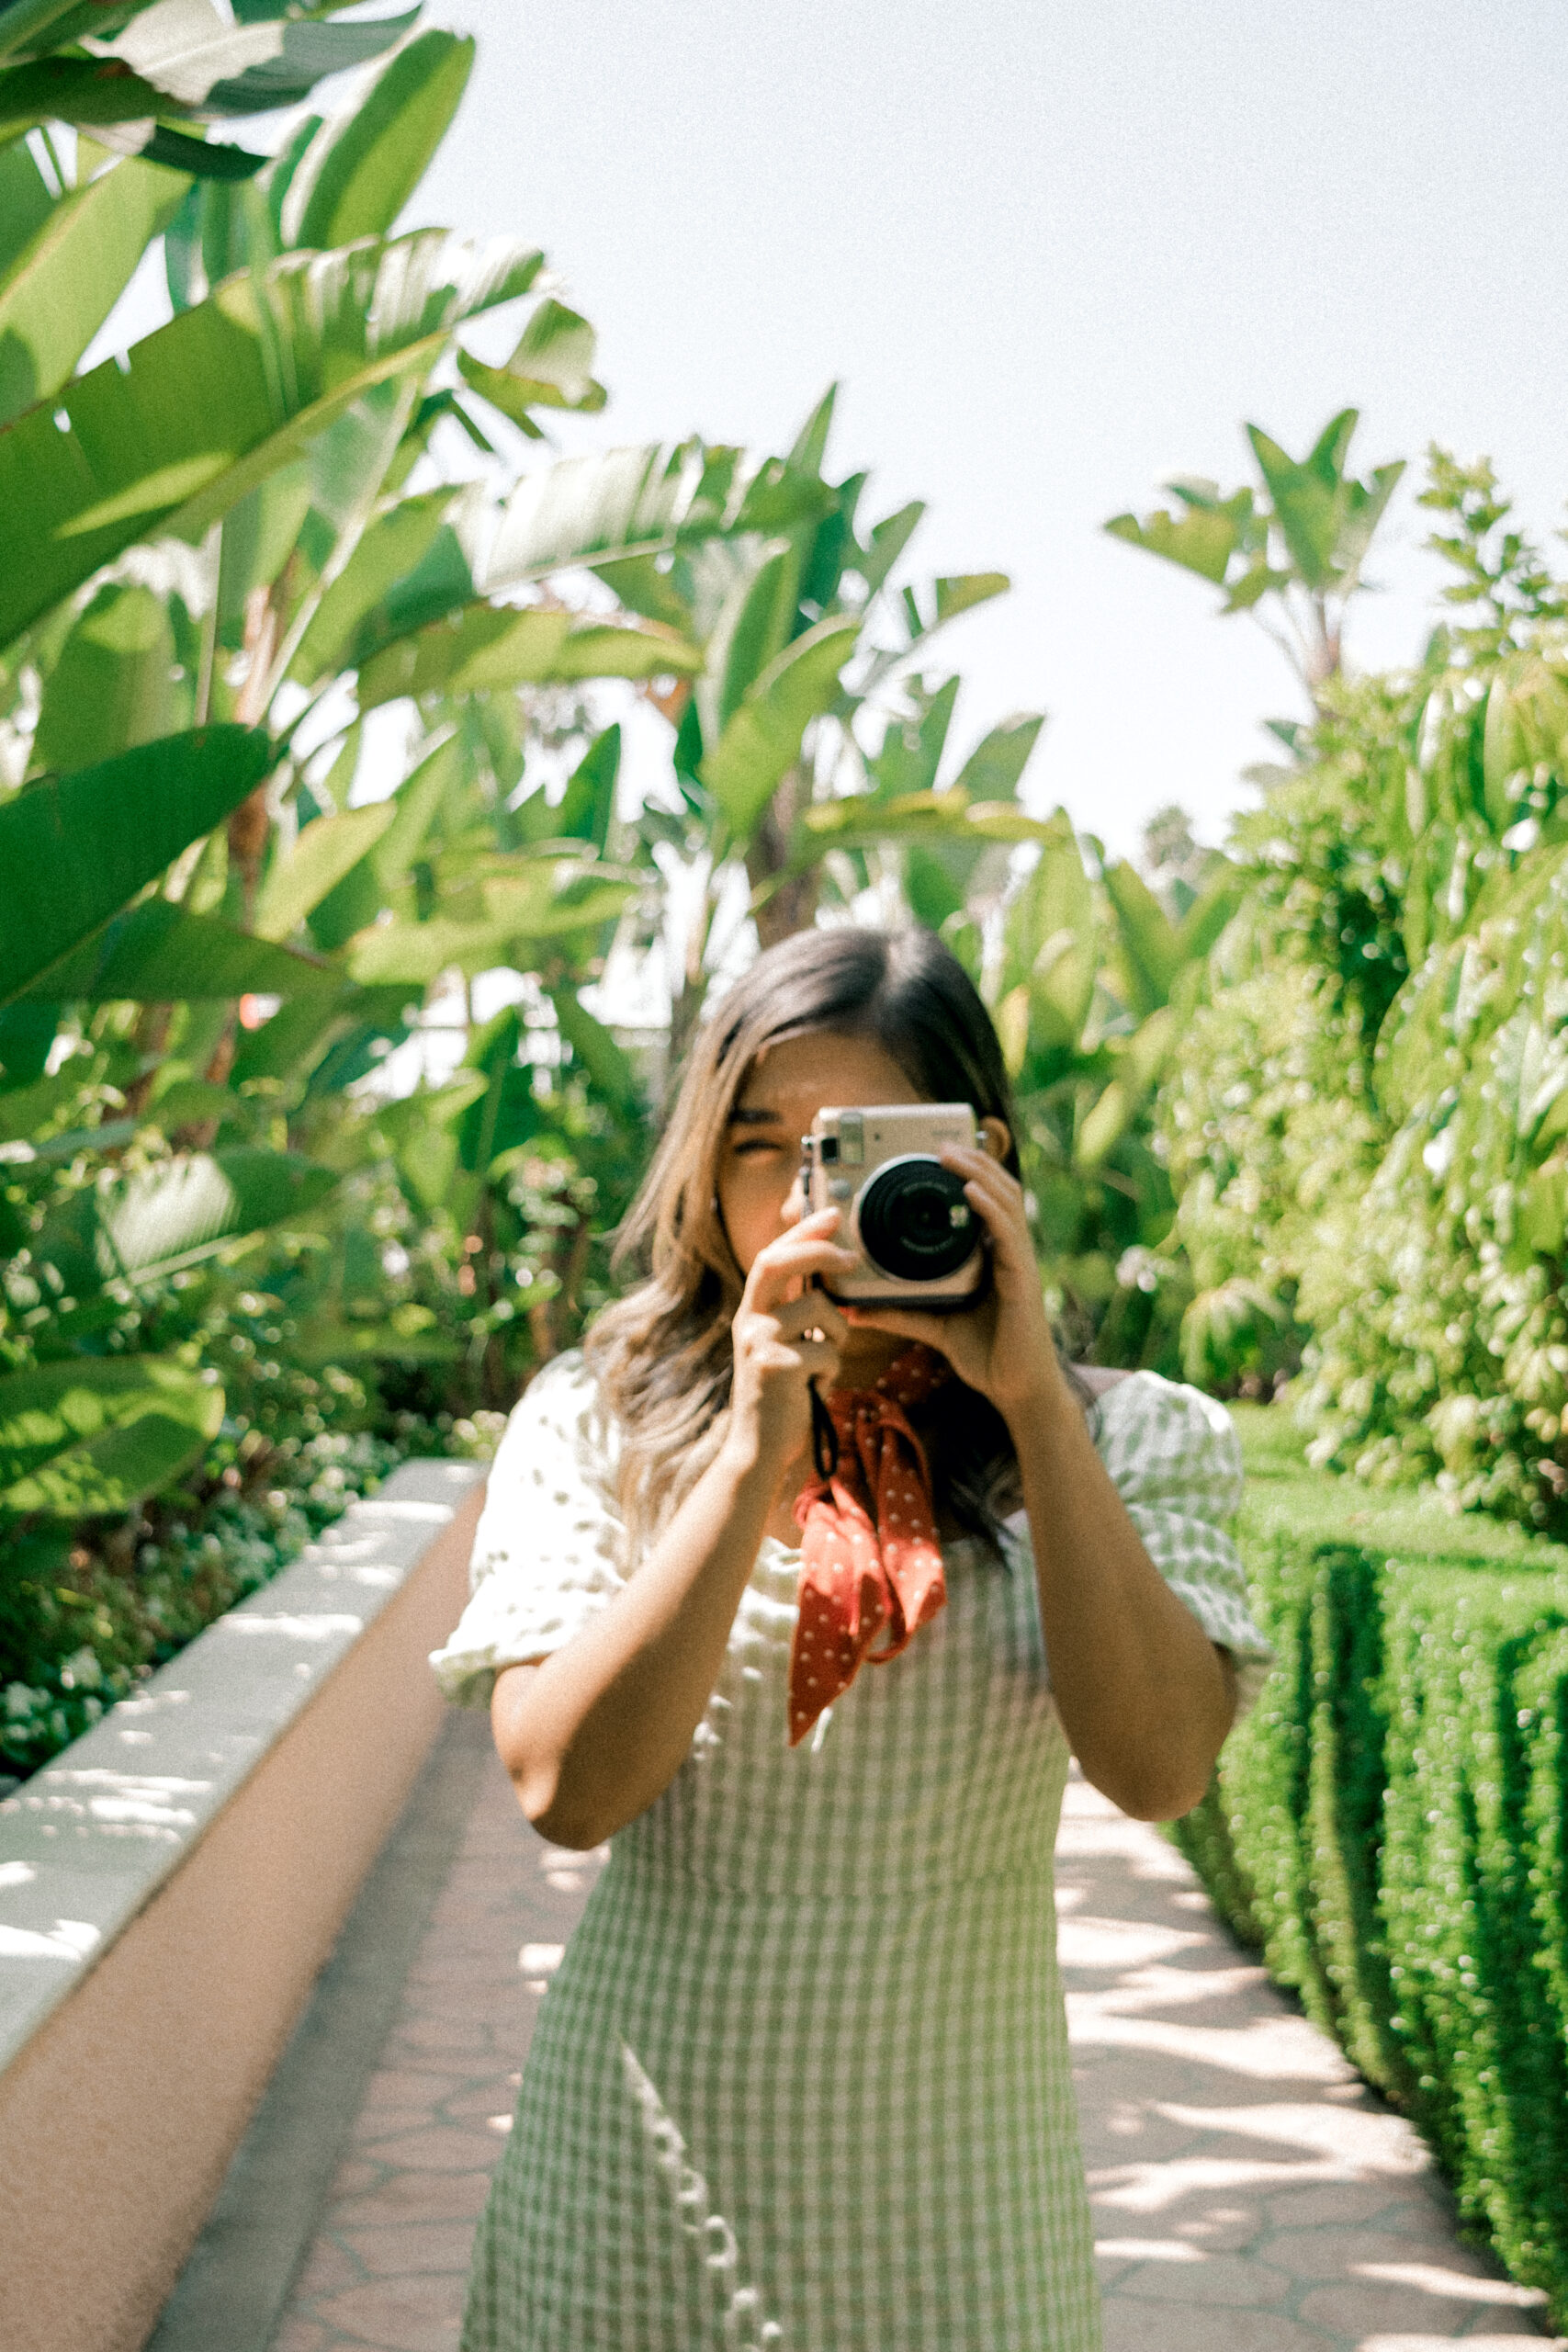
Here are 12 Instax photography tips and tricks I used from visiting LA for the first time!
My college friend moved out to California, and I had so much fun visiting LA’s famous sights with her! (It was the farthest out west I had ever been in the US at that point!)
Looking to watch a video for tips instead? Watch Fujifilm Instax Mini 70 Tips here. (This blog post may be a bit more thorough than my video. However, the video provides better context of the atmosphere and environment in which each polaroid was taken in.)
My Collection of Instax Cameras
Traveling with more than one camera can be a hassle, but having Instax camera for vacation is always worth it!
Looking at my collection of new and vintage cameras, I’ve now owned:
- 1 polaroid printer (Fuji film Instax Mini Link Smartphone Printer)
- 5 instant cameras in total:
- Polaroid 300 (discontinued)
- Polaroid Sun 600 (antique thrift)
- Fujifilm Instax Mini 8
- Fujifilm Instax Mini 11
- Fujifilm Instax Mini 70.
Q. Which Instax camera is best?
A. The Instax Mini 11 is the newest from my list (released 2020). But, I bought it refurbished from Amazon a year ago, and a lot of my recent polaroid prints have been so blurry!
Unfortunately because of that, I’ll have to keep my Instax Mini 70 as my top favorite for now (released 2015) mostly because of its bells and whistles. The Instax Mini 70 has a timer mode, a small mirror to take selfies with, a tripod mount, and 6 settings for different scenarios (more on that below).
This instant camera automatically turns off after a little while to save on battery life which is helpful, because it takes 2 pricier CR2 lithium batteries instead of conventional double AA batteries.
The instant photos I’ve developed from my Instax Mini 70 have been crispy with high contrast for the most part.
Bonus: My pastel blue Instax Mini 8 was “on brand with Abby Joy Studio”, but I’ll have to say—I like my gold Instax Mini 70’s nod to vintage film cameras (despite the initial surprise that it is a little shinier than its matte pastel counterparts).
Some other Instax Camera Recommendations
If you’re looking for instant photos that are bigger, consider looking into the Fujifilm Instax Square or Fujifilm Instax Wide (more rectangular) series.
If you’re nervous about not being able to preview what you’re printing, consider looking into the Instax Mini Liplay or Instax Square SQ20 as they both have monitors in the back. Even though I have a polaroid printer where I can print anything from my phone, I still prefer the anticipation that comes from a regular Instax.
Instax Cameras are Worth It
Instant photography as a beginner photographer or even a seasoned photographer is helpful for practicing with natural lighting and composition in an intentional way (vs. clicking the shutter multiple times with an iPhone or DSLR). An instant camera also helps you avoid getting confused with all the technical settings of a DSLR: ISO, aperture, shutter speed.
As you’re thinking of visiting LA for the first time, I hope this photo walk using my Instax photography tips helps you capture LA in a memorable, portable way!
p.s. However, remember, travel isn’t only for Instagram; it’s about the experience. Photographing your trip should *not* be overwhelming; travel photography should be fun, inspiring, relaxing—and a great way to remember your experience!
Instax Photography Tip #1: How to Bring your camera through Airport Security
Before flying, I prefer to keep my full film pack unopened and my Instax camera empty with no film. This allows me to keep my polaroid camera in my personal carry on or even my checked baggage since the Instax camera is essentially just a piece of plastic and checking an empty Instax in causes no negative effect.
Traveling with a polaroid through airport security can be slightly stressful for me. (I’m already removing my Apple watch, laptop, DSLR, lenses, phones, shoes—what else do you want?! Haha, thankfully covid has lessened some of these protocols, but my life goal is to eventually get TSA PreCheck to travel with my cameras more easily).
If you do already have film inside your Instax camera, make sure to ask airport security to perform a hand-check for your Instax camera or else the x-ray machines will ruin your film. Most if not all of airport security has handled this case at least once, so don’t be nervous!
Instax Photography #2: Be Frugal with Your Film
Instax Mini film is expensive at around $1 per shot. For me, I wait for special moments, celebrations, specific emotions, atmospheric moods, and lighting. If you watch my video, I almost take polaroids of the Lost Bookstore and the cactus patch, but, alas, the scene just wasn’t clicking in my head.

Instax Photography Tip #3: Don’t Mess with the Scene Too Much
For this photo in my friend’s apartment (cheapest place to stay when visiting LA for the first time, lol), I wish I didn’t get up and fix the blinds, because for one, I broke one of Amanda’s blinds (ha) and second, it ruined my morning trance and the light pattern.
Instax Photography Tip #4: Embrace the Result No Matter What
Yeah, I know; this sounds fru-fru-ey, but listen, when you a) know that film is expensive and b) there’s only so many you can shoot on a trip, it’s easy to second guess everything, become a perfectionist, and in turn dislike the result.
Just like with having a film roll developed at a photo lab, seeing your Instax camera’s print out can be quite a surprise and/or disappointment.
But, not knowing what you’ll get is half the thrill of it! In my video, you can watch how nervous I get each time I click the shutter, but honestly, I’ve gotten a lot better with simply accepting the result nevertheless! Even if the images are dark or blurry, they’re still memories to remember.
In the previous photo in my friend’s LA apartment, I ended up not loving the blown out white bedding, the crooked lines, and the darker gradient up top in this polaroid—but this polaroid still reminds me of the bright morning in my friend’s apartment, the photo editing sesh we had on her kitchen table, the rotisserie chicken we shared, and the terrible movie we streamed.

Instax Photography Tip #5: Compensate for the Lens Location
The Instax camera lens is slightly on the left while the viewfinder (eyepiece where you’re looking through) is on the right, so when framing your composition, make sure to compensate for that positioning.
My friend and I went to brunch at Leo & Lily’s where apparently celebs are known to be spotted (ooh-ahh), and I of course had to photograph our food!
The composition in this photo is not very good—I was looking to keep the plate centered but because the viewfinder (to the right of the camera) is not aligned with the lens itself (in the middle of the camera), the composition sits slightly askew. I did try to compensate for this weird configuration by shifting my body to the right more “so that I was framing based on the lens, not the viewfinder,” but it was still a hit or miss.
Instax Photography Tip #6: Find Gradual Contrast in Lighting
Because your Instax camera isn’t as high-tech as a DSLR and has a harder time photographing a scene’s differing shades of lights and darks (dynamic range), it’s best to photograph scenes that have visible gradual contrast in lighting. The word gradual is key in Instax photos since having a big leap from light to dark can result in something a little flat, washed out, or completely dark.
For example, my friend and I found a cute cactus patch on the side of the road on our way to Santa Monica Pier, and I had the vision of photographing a cactus at a macro level (super cropped in).
However, I ended up skipping this spot, because it was high noon with the sun being extra harsh with not enough dynamic range.
Taking photos at high noon is not unheard of; in fact, it can yield editorial photographs with rich shadows, but with cacti spikes all around, it was difficult to find a clean surface with shades of light gradually melting into deep shadows.
I wanted a macro shot of a cactus but it was looking too chaotic.
The lack of soft gradual shading made the spikey cacti scene more chaotic and did not inspire me (it was also very hot!!).
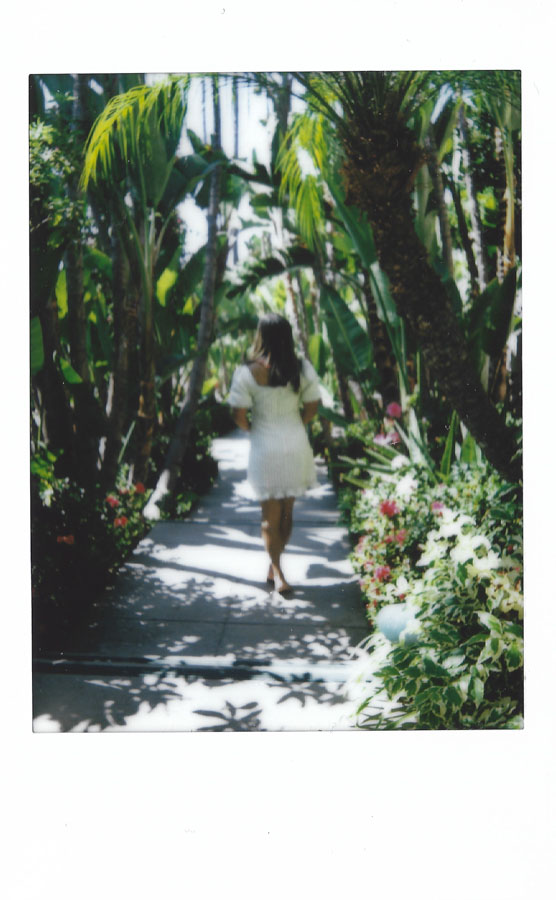
An example scene that did have great graduate contrast in lighting was this polaroid from the Beverly Hills Hotel. What makes this photo interesting is that it’s not all fully in the sun/light or in the dark (or even 50% light, 50% deep shadow). The canopy of trees sits in differing light intensities; some parts were in full shade or sun while some were in partial shade or sun. The patterns created by the wide dynamic range creates a beautiful rhythm for the eye.

Instax Photography Tip #7: Train Your Eye for Color
This tip applies for any kind of camera but is definitely helpful with Instax cameras since the result is always a surprise and since instant cameras have their own coloration that is difficult to edit later on—basically you see what you get! You might as well train yourself to spot scenes and colors you know will result in a great outcome.
The previous photo is my favorite polaroid from LA, not just because of the great shadow play, but because of the colors.
Train your eye to spot color harmonies by studying the color wheel for analogous colors (three colors side by side), complementary colors (colors across from each other), tertiary colors (colors that form a triangle together). To find more visuals, search color palettes on Pinterest.

Instax Photography Tip #8: Learn Which Instax Setting to Use
Both the Instax Mini 8 and the Instax Mini 70 have multiple modes to choose from, but specifically the Instax Mini 70 has these 6 modes: hi-key, macro, landscape, fill-in flash, selfie, timer.
- Hi-Key: Hii-key in digital photography means the whites or skies are brighter with minimal dark contrast. Many wedding photographers I’ve studied shoot and edit this way to achieve a “light and airy” look.
(Minor slip-up: In my video, my friend and I both believed that the hi-key mode was for a scene that was already super bright. BUT it actually means that the scene needs to be brighter.)
- Macro: Pick this setting for photographing a subject super close up (30-60 cm) so that the camera can focus on the details even up close. If you don’t select this and you’re shooting closely within inches, your camera may have a hard time focusing, resulting in a blurry image.
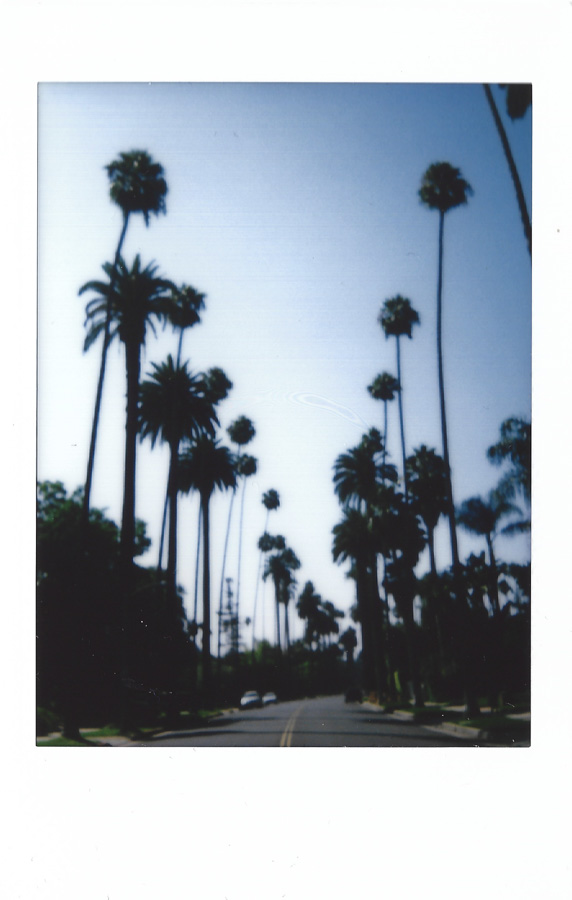
Funny story, I accidentally selected the Macro setting to photograph this line of trees because we were having to quickly dodge oncoming traffic and for some reason I thought the “flower icon” meant “plants,” LOL. It still got the job done! Don’t stress out too much about the modes and refer back to Tip #4. - Landscape: Use this setting when shooting a distant subject (3 m~∞).
- Fill-in Flash: The regular flash will go off no matter which setting you’re in. However, fill-in flash will trigger a stronger flash for proper exposure in lower-lit situations.
Flash can be used either for a “nostalgic film camera” look or to balance any situation when your subject is in shadow and the background is extremely brightened by the sun or artificial lighting (back lit).
- Selfie: If you would like to take a selfie, the Instax Mini 70 has a selfie mode and a selfie mirror so you can view how you’re framing your face.. The Instax Mini 70 camera also allows you to extend the lens for your selfie. Make sure to hold the camera securely for avoid blur.
- Timer: This camera can be set to take 1-2 photos on a timer in a row! The best thing is that it also has a simple mount at the bottom of the camera that inserts into a tripod.
Instax Photography Tip #9: Crop In Closer
Sometimes when I ask others to take a polaroid of my friends and me, I like to make sure that they take it at the waist and up vs. from far away. I personally want to see our expressions clearly versus what we’re wearing.
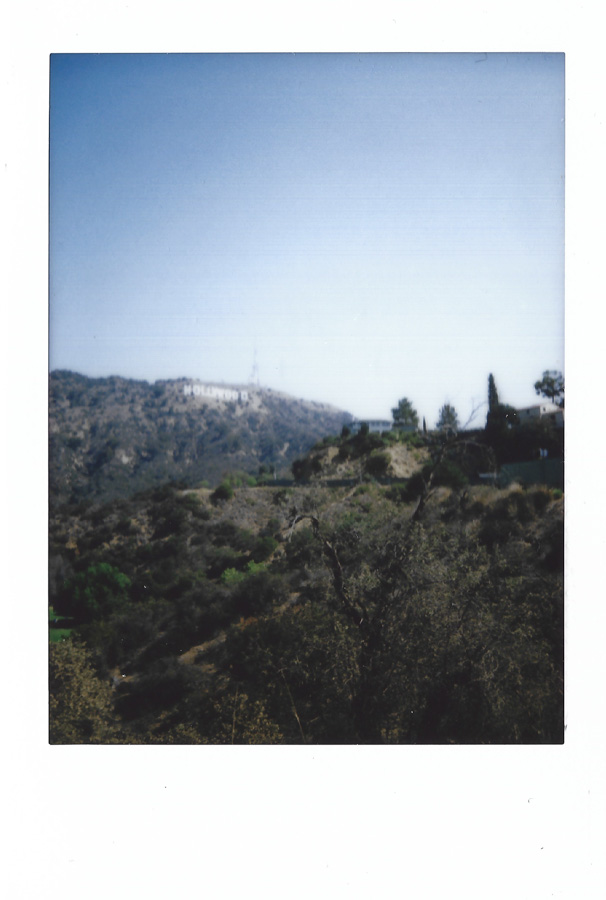
This “cropping in” technique can be used for inanimate objects as well. I think that cropping out clutter and even a cloudless sky can make the image pop and be more impactful. The image of the Hollywood sign above isn’t as impactful since I was so far away.
Being closer to your subject also helps with making sure the subject is within the focus range, resulting in a crisp photo.
Instax Photography Tip #10: Refill your Instant Film Correctly
(As you travel, consider bringing an extra pack of film and CR2 lithium batteries just in case.)
Watch this video clip to learn how to load film into an instax.
Once you open your Instax film pack* (preferably after going through TSA; refer to Tip #1), you’ll see that one side of the film canister will have a graphic of a “finger crossed out” and the phrase “do not press here.” The other side of the canister will have a yellow tick/tab.
There is a yellow tick on the upper right corner of the back of the opened Instax camera indicating where the film’s yellow tick should meet.
You’ll need to insert the side with the finger graphic into the camera first while keeping the yellow tick on the other side on the upper right corner. The two yellow ticks should line up together.
If you are positioning the film incorrectly, you shouldn’t be able to close the camera door.
Eject the Sample Shot Film Cover
Once you have the film canister placed correctly, there will be one “sample” shot before the actual polaroids will be used. The sample shot is actually the black rectangle with the finger graphic as it was used to preserve the rest of the polaroids.
After shooting the sample shot, do not open the camera door as it will expose your film and possibly deem them all unusable. If the film comes out white with no detail, it means that the film pack is no longer usable. The back of the film will be red when “exposed.” Instead of throwing it all away, consider drawing or lettering on the film with markers or paint so you can repurpose!
However, if you have accidentally knock the door open, don’t stress out yet; there’s still a possibility that your film is fine especially if the door is only slightly opened ajar and in a dark setting.
*If you have a Polaroid brand instant camera, you may still be able to use the Fuji film Instax Mini film. That’s what I used for my Polaroid 300!
Psst! Make sure to pick up any of the little film leftovers when you’re traveling to avoid littering.
Instax Photography Tip #11: Practice Camera Care
- Keep your Instax Cool: This goes for all photography but one tip to keeping your Instax safe is by keeping it in a cool, dry place. My phone was alerting me that the temperature was too hot at the cactus patch we visited, and if my phone was telling me that, my instant camera may have been experiencing it too but just had no means of telling me.
- Use a Dry Bag for Wet Environments: When my friend and I visited Point Dume, I wished I used my dry bag, because on our way back to the main beach, the tide had come in and we had to scale rocks along the shoreline. I love the water, but this moment was honestly bone rattling—especially because I had my DSLR and Instax in my regular backpack as we waded in the crashing waist-deep ocean water. If I had had my dry bag, it could have been used as a floatation device if worse came to worse!
I’ve also used this dry bag for island hopping in the Philippines, and if you’re adventuring in water anytime soon, you can watch this tutorial for how to use dry bags for cameras.
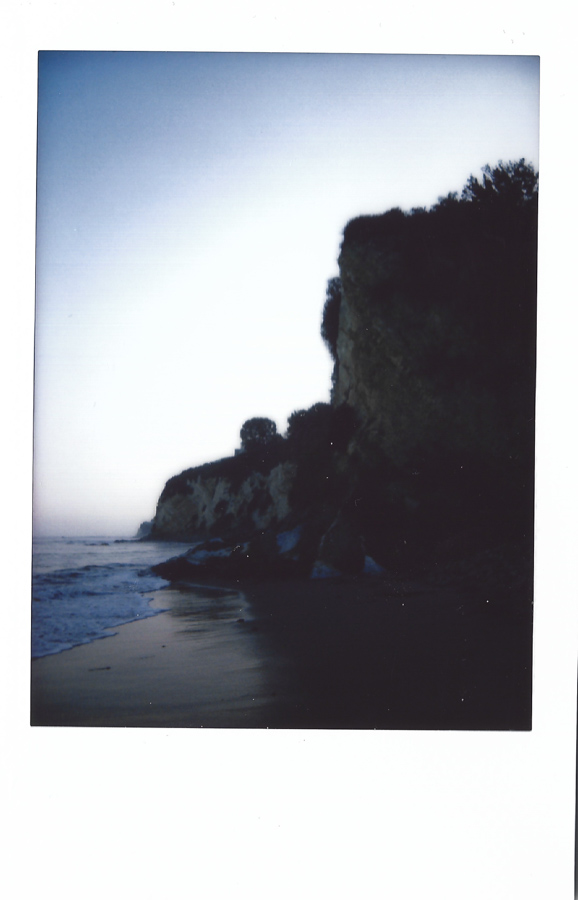
Instax Photography Tip #12: Keep Yourself Safe
Be aware of your surroundings. As noted above, our adventure at Point Dume could have gone awry very quickly. If you’re venturing out in the middle of nowhere, make sure a trustworthy friend nearby knows where you are.
Know when the tide comes in and when the sun goes down.
Also, watch your belongings. Having an Instax is pretty fun and unique; some people may want one and will go to extremes to claim one.
————————
The best way to get better with your Instax is to really just practice. I have been traveling with a polaroid since 2013 (woahh), and I’ve definitely had my fair share of spoiled film and mishaps. Once you know the basics of instant photography, you’ll be able to try different techniques like double exposure next! To browse more of my portfolio, visit here.
I want to thank you for reading my blog post, and I hope these 12 Instax photography tips help and inspire you when visiting LA for the first time!
Still stuck? Watch my video Fujifilm Instax Mini 70 Tips to see a visual context of the environment in which each polaroid was taken in.
